What is IcoMoon?
IcoMoon is used to make fonts for your custom svg icons. If you have ever used fontawesome icons or bootstrap icons you may be familiar with how we add them in html code , we just include a link for the icon library and start using them like this
<i class=”fa-solid fa-bars”></i>
We just specify the parent and child icon classes and the icon is rendered. But what if we need to add an icon that is not found in a library or we want to add customized icons,although we can add the svg image by putting it in the assets folder and referencing it through <img/> tag , but this has some limitations like:
- Larger build size.
- Unable to manipulate icons using CSS properties , for e.g you can’t change the color of an icon using CSS ‘color’ property.
To overcome these limitations and make our own customized icons that can be used just like we use fontawesome or bootstrap icons, we can use icomoon
How to add IcoMoon to Angular project
Go to https://icomoon.io/app , click on Import icons button on top left corner , then select svg icon/icons from your computer (Important : make sure to convert your svg into fills , you can use this or any other online tool https://iconly.io/tools/svg-convert-stroke-to-fill).
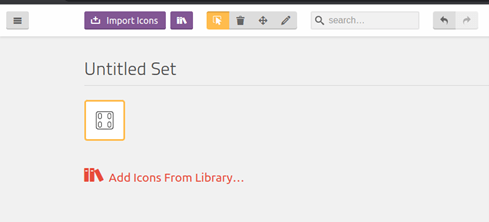
In the above picture we have imported one icon , we can use above 4 options (on right of purple book icons , on header) to SELECT/DESELECT, DELETE, MOVE OR EDIT the icons respectively.
After importing icons click on generate fonts button on the footer below:

A screen like this will appear
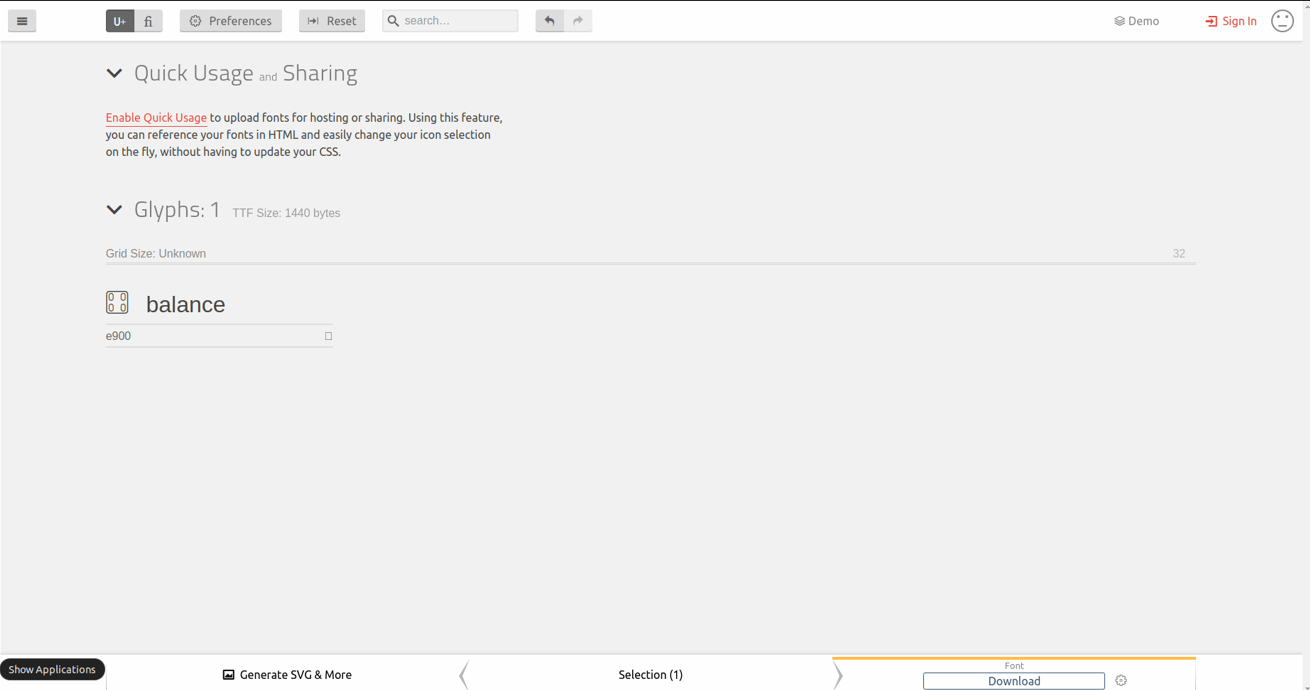
Here you can rename the icons and change their codes , if you have a paid plan you can enable quick sharing and that will generate a link that you can add to your project and you will not need to set up icomoon locally in your project.
If you don’t have a paid plan then you need to add icomoon locally to your project, to do so:
- Click on the download button on bottom right (Downloads a zip file)
- Extract and put the extracted folder by the name of icomoon in the assets/fonts folder.
- In your angular projects styles.scss file add these line
@import "assets/fonts/icomoon/style.css";

@import "assets/sass/_easy-icon";
4. In your angular projects styles.scss file add these line
5. In _easy-icon.scss file add this code
$icons: (

balance: "\e900",

);

$rotate: 45;


.easy-icon {

font-family: 'icomoon' !important;

font-weight: 400 !important;

font-style: normal;

font-variant: normal;

display: inline-block;

text-transform: none;

line-height: 1;

opacity: 1;

-webkit-font-smoothing: antialiased;

-moz-osx-font-smoothing: grayscale;

transition: all 0.3s ease;

transform: rotate(0);


&.button {

background: transparent;

border: none;

outline: none;

padding: 3px 3px 0 0;

&:focus {

box-shadow: none;

}

}

@each $icone, $letra in $icons {

&.#{$icone}:before {

content: '#{$letra}';

}

}

@for $i from 7 through 100 {

&.size-#{$i} {

font-size: #{$i}px !important;

}

}

&.not-easy-icon, .not-easy-icon {

font-family: 'Open Sans', sans-serif !important;

}

&.pointer {

cursor: pointer;

}

@while $rotate <= 360 {

&.ei-#{$rotate}g {

transform: rotate(#{$rotate}deg) !important;

}

$rotate: $rotate + 45;

}

&.outline {

border: 2px solid $principal;

background: #ffffff;

font-size: 1rem;

}

&.outline-1 {

border: 1px solid $principal;

background: #ffffff;

font-size: 1rem;

}

&.stack {

box-sizing: border-box;

display: inline-block;

height: 2.3em;

line-height: 2em;

padding: 6px;

padding-top: 10px;

position: relative;

vertical-align: middle;

width: 2.2em;

.stack-1x {

font-size: 0.8em;

font-weight: 600;

line-height: 2.2em;

top: 7px;

}

.stack-2x {

font-size: 1.3em;

}

.stack-1x, .stack-2x {

color: $input-border-color;

left: 0;

position: absolute;

text-align: center;

width: 100%;

}

.del {

display: none;

position: absolute;

right: -10px;

bottom: -10px;

height: 24px;

width: 24px;

align-items: center;

justify-content: center;

}

}

&.active {

.stack-1x {

color: $principal;

font-size: 1em;

line-height: inherit;

}

.stack-2x {

border-bottom: 1px solid #fff;

bottom: 0;

color: $principal;

font-size: 2em;

}

.del {

display: flex;

}

}

&.borda.active {

background: #fff;

box-shadow: 0 0 0 1px $input-border-color inset ;

padding-top: 6px;

&:before {

content: "";

height: 15px;

width: 20px;

background: #fff;

border-right: 1px solid $input-border-color;

top: -9px;

right: -11px;

position: absolute;

transform: rotate(135deg);

}

}

}
Now everytime you add an icon you need to add it in the $icons variable in this file also (name:code)
$icons: (
balance: "\e900",
);
To use this icon, restart your dev server and now you can use it like this:
<span class=”easy-icon balance”></span>
Adding new icons to existing IcoMoon project:

Head to icomoon app, click on import project then select the src/assets/fonts/icomoon/selection.json file and you will have all icons of that project loaded in the icomoon app , now to add a new icon follow the steps described above , after adding all icons download the zip file again and replace with old icomoon folder in your angular project.
Conclusion:
You can also add icomoon to your React, Vue or other technology projects in a similar fashion.